{IN}Design

Apr 26, 2013

Deals and Steals

This past weekend my sister-in-law Christie and I took a trip to Midland Arts & Antiques Market.  If you live in Indy and have never been- go! It's a great, huge antique mall with all sorts of treasures.  I do think many of their booths are a bit more expensive than other antique malls out there, but they have a lot of quality pieces, including a lot of beautiful furniture.

Source

We went to Midland with no particular purpose in mind, other than the fact that I've been itching for a new furniture-painting project.  (Ignore the fact that I have multiple unfinished projects at home.  I certainly am). Unfortunately a lot of the things I loved were outside my price range, but I did come home with this mirror for only $30.


My plan is to paint it either creamy white or gray, distress it a bit, and hang in on this wall in the dining room.


And of course I couldn't leave Midland without adding another Ball jar to my collection.


I loved the little size, intense bluish green color, and the bicentennial eagle on the side.  (See Bobby, it is different than the others I own!) For $7 I couldn't resist.  I believe my exact quote was "Oh yeah, this little guy's coming home with me".

But the most exciting purchase of the day was actually a Craigslist find.  I've been looking for some dressers and other pieces of furniture that are in good shape but just need a paint job.  This one definitely fit the bill for $35, including  a matching mirror! 


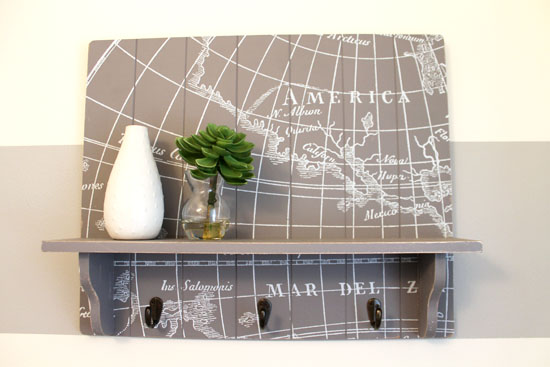
For now this picture from Migonis Home is serving as my inspiration, but I may change my mind between now and then.

Source

There you go- my weekend deals and steals! Anyone else finding anything good from Craigslist or a thrift shop recently?  Anyone in Indy have suggestions of "must visit" thrift shops?
Read More

Apr 21, 2013

Getting the Deck Summer-Ready

Now that the warm weather looks like it's here to stay (although I probably just jinxed it), we thought it would be a good time to drag out our deck furniture. Here's what the deck looked like all winter:


Pretty sad and lonely.

We got our deck furniture at the end of summer last year. This is a great time to buy since prices are seriously reduced as fall approaches. After a lot of research and debate we got a loveseat, chair, and table from the Target Threshold Belvedere Wicker set, seen here.

Source
 
Because we have a Target Red debit card we got 5% off our order, plus free shipping. The free shipping alone saved us over $75! (Side note- best card ever. I love that it's a debit card, instead of a credit card.  There's also no minimum purchase to get free shipping).

After buying those furniture pieces we found two side chairs at Lowes, also on clearance at the end of the season. They are such a close match to the Belvedere design that we had to add them. I didn't see them on the Lowes website, but they are the Allen + Roth 'Connelly'. They came as a set of two that retailed for $100 and we got them for $50.

Drum roll please... Here is our deck after getting out the furniture.   


Not bad for mid-April, right?  The two pillows are from Lowes. The lantern is from Homegoods. The flower pots are a mixture of Target, IKEA, and Homegoods.  I'd like to get some more bright plants and flowers to add some color.  I'm also considering an outdoor rug. Does anyone have any suggestions? Finally, our big project for later this month will be to stain the deck.  We're currently leaning towards a dark espresso brown to contrast against the green house.  Just checking things off that summer to-do list.

Now all we need are some burgers and pitcher of sangria!
Read More

Apr 11, 2013

Outdoor To-Do List

I don't know about you, but I am SO happy for the warmer weather we've been having recently. At one point I was pretty sure Indiana was never going to see sunshine or temperatures above 40 degrees ever again.

This nice weather has me thinking about all of our outside projects.  So here is our outdoor to-do list, as of today.  My hope is that most of this gets accomplished in 2013, but we all know how that goes.  I'll post progress pictures as we chip away at the list.

1. Stain the deck a dark brown. It's a light natural wood right now.
2. Stain the concrete steps in the back. Maybe gray?
3. Paint the front porch area and trim around the windows (cream?). Right now our house is an olive green color, and the front porch columns and trim are a slightly lighter shade of green. There's not much contrast in the colors, so the really pretty detail work is lost.
4. Paint the front and/or back door a fun color.  Maybe navy?
5. Remove the front screen door. It's ugly and we never really leave the front door open anyway.
6. Fix the broke basketball hoop. Right now we have just a post, with no backboard or hoop. Bobby would like to change that, so he can get his Cody Zeller-on.
7. Do some landscaping and plant flowers. Since we moved in in August we don't know what will bloom this spring, so I want to wait and see before we do anything. I do know there are peony bushes in the backyard, and I can't wait to see them in full bloom!
8.  Work on decorating the back deck area. We already have furniture, but I'd like to get some more planters, lanterns, and maybe bistro lights.  We'll be setting up the deck furniture this weekend, so prepare for a post on that in the near future.
9.  Get a rain barrel. Maybe a compost bin?
10. Plant an herb garden.  We have a little planter left by the previous owner.  I just need to fill it!

That's all I can think of for now, but I think it's enough to keep us busy well into the summer!  What about you guys? Any big outdoor to-do lists?

I'll leave you with a few inspiration pictures!

  
Source  

  
Source
Source

Read More

Mar 26, 2013

Recipe Round-Up, March 2013


So far this blog has been all home renovation and not much else.  But in addition to painting and decorating, I love to cook in my free time. Bobby and I take turns cooking dinner most nights of the week. I recently added all my favorite recipes to a Google Drive folder, which makes organizing and accessing them much easier.  (Let me know if you'd like me to share the folder with you!)

Pinterest has definitely helped me expand my cooking and baking horizons, so I wanted to share a few of our recent favorites!

Asian Slaw with Peanut Ginger Dressing from Once Upon a Chef: I brought this to a work potluck (or pitch-in, as people in Indiana say), and it was a huge hit. It's colorful, full of flavor and texture, and a great way to eat your veggies.  I used one bag of coleslaw and one bag of shredded carrots and it made a very large batch. Add some grilled chicken or shrimp and you have yourself a substantial meal.

Crock Pot Pumpkin Turkey Chili from Skinny Taste: I love pumpkin and I love using my crockpot, so this is a match made in heaven.  The pumpkin flavor is subtle, but a great new take on chili.  We've made it with turkey and chicken, and both are good.  (Tip: Aldi carries canned pumpkin year round).

Black Bean & Quinoa Veggie Burgers from Prevention RD: I've been trying to cook vegetarian more often, so this recipe seemed like a good place to start.  We both really liked the flavor- even Bobby, who was very skeptical.  Instead of a chipotle I used some chili powder.  The yogurt sauce is excellent too.  They're very filling, so we froze the patties that we didn't eat for a future dinner.  

Banana Banana Bread from Amandeleine: Way too often I'm guilty of letting bananas get too ripe on the counter before we eat them.  When this happens I just throw them in the freezer (peel on) to save for future banana bread making. This has become my go-to recipe.  It's super moist and actually tastes better after a few days.  The recipes calls for six bananas, but I often use five and it turns out fine.  

What new recipes have you been trying? Any good ones that you would recommend?


Read More

Mar 22, 2013

Project: Pantry

File this one under "nothing groundbreaking, but totally necessary".  (You have a file for that, right?)  I'm talking about pantry organizing.  Our kitchen has two pantries- one is fairly small and the other I would call medium sized.  It holds a lot, but it's not like some of those beautiful walk-in pantries you've seen on Pinterest.  Case in point:

Source
Source

Source
Can you even imagine?  I would just take my book in there and relax among the organized canned goods.

Here are the two pantry-types areas in our kitchen.  The smaller one is really two vertical cabinets.  The other is more of a small closet.  Here's the view of our pantries from inside the kitchen.


Before I did any organizing I used some leftover white semigloss paint and did a quick two coats on the inside of the door.  You can see in the picture above the difference in the colors after I painted those two squares at the top.  Here's another shot.
Gross, right?


In the top right pantry we keep oils, dressings, soups, and canned goods.  That lazy susan is from Crate and Barrel, although I've seen them at Bed, Bath & Beyond and Home Goods.  On the bottom right we keep cat food, onions and potatoes, baking supplies including flour, sugar, etc., and other odds and ends like peanut butter and pesto.  We used to also kept our spices on that tiered wire shelf. 


The bigger pantry on the left keeps all boxed goods like cereal, crackers, cookies, pasta, rice, cake mixes, etc. We also keep our broom and Swiffer Wet Jet in there.

The main issue I had with the pantry was the way the spices were stored.  Even though I had one of those three-tiered shelves it was difficult to see anything beyond the back row.  Reaching for anything in the back row required also taking out anything in the front or middle rows.  Plus I had too many spices for the shelves, so then I had another plastic basket next to it with the overflow.  It was a big pain.  (First world problems, I know).

The back of the door of the bigger pantry wasn't being utilized, so I decided attaching a rack there was the best option.  Lucky for me, The Container Store (TCS) was having their 30% off Elfa sale at the time.  Their stuff isn't cheap, so I'll take any discount I can get!  You can view their wire storage systems here.

After some debate we got three Spice Rack Baskets, one Shallow Basket, and two Narrow Deep Baskets, plus the vertical mounting bracket and screws. We got everything in white to blend in with the door. Don't forget to measure the height and depth of your door before heading to TCS. I didn't measure the depth and had to return one basket (a regular Deep Basket) that didn't fit.

Installation was super easy (especially for me, since Bobby did all of it).  Here it is, in all its spicy glory!


It's so much easier to find our spices.  And yes, I alphabetized them.  Might as well go all out.  This project wasn't difficult or time consuming, but I love small projects that make your life easier in a big way.  Bobby has caught me just staring into the open pantry on more than one occasion :)
Read More

Mar 15, 2013

Totally Floored (AKA Half-Bath Makeover, Part 3)

(You can read part 1 here and part 2 here).

At this point in our half-bath makeover I was feeling pretty darn good.  In a little over two days we had transformed our tiny boring beige bathroom (say that five times fast) into a fun striped room with plenty of style. However at that point it also become painfully obvious that the old laminate flooring was not working.  Before the makeover the floor just blended in with the beige walls, making it barely noticeable.  But since I painted the trim bright white, along with white and gray walls, the laminate looked pretty dingy.  Bobby was actually the one who pointed it out and got the ball rolling on this part of the project, which never happens!

Yes, there is plastic wrap around the toilet.  This was our fancy way of protecting it as we painted the wall behind it.

After researching and debating a few options, we decided to head to Lowe's on Monday and check out peel and stick tile.  It seemed like an easy and affordable way to do a new floor in a small space.  I was pleasantly surprised with the amount of tile options they carried. Prices ranged from about 75 cents to a few dollars each, for a 12" x 12" tile.  Since our room was 5' by 6' we calculated we would need 20 tiles.  (5x6= 20.  Even I can do that math).  We ended up getting 23 just to give ourselves room for error in case we messed up one of the cuts.

When choosing a tile design we wanted one that had some gray undertones.  Thankfully we were able to find one that we loved. It's called the Style Selections 12" x 12" Gray/Brown Slate Finish Vinyl Tile, from Lowe's.    


It was even one of the cheaper options at 88 cents per tile, making our total for 23 tiles $20.24 plus tax.  Online reviews were overwhelmingly positive, saying they looked great and were easy to install. Some commenters said they didn't hold up well over time in high-traffic areas, but we don't have lots of people walking through our half-bath on a daily basis, so we figured we were in the clear.  However if you're looking to do the floors in your kitchen or a main hallway you might want to look for a more durable product.

After getting our tiles home we did a little prep and planning. First I swept and wiped down the floor to get off any dust and grime.  You want to put down tiles on a floor as clean and level as possible.  We then layed down tiles (paper backing still attached) to see how it all looked. We also wanted to determine the best placement to avoid as many cuts as possible.   We decided we would start in the center of the room and lay our tiles off centered, like a brick pattern, rather than stacked evenly on top of one another. And then, basically, we winged it!  Honestly the process was pretty easy until you get to the cuts.  You just peel off the back, place the edges of the tile where you want it, and then press down.  The backing is very sticky, so there's not a lot of wiggle room once it's down.  So just make sure you have it where you want it and press each tile firmly against the others before putting it down.  We used a level to make sure our edges were lining up and that we were staying on a straight line.  Here's a picture of some good progress:


To do the cuts Bobby measured very carefully, and then used a large utility blade to score the tiles.  Once you've scored them a few times you basically snap them in half.  We definitely learned the importance of a sharp blade.  The duller the blade got the harder the cuts were to make, and the edges were rougher.  We had to use sandpaper on some tiles to smooth the edges.  If you look closely on the right side of this picture you can see some white in between two tiles.  That is a spot that wasn't very smooth.  Fortunately those spots are few and far between, and you really have to look closely to find them.


We debated whether or not to remove the toilet to tile underneath, but by that point Bobby was feeling pretty confident in his cutting ability so we left it there and tiled around it.  He used a sheet of paper to make a template to cut those rounded parts.  Tiling around the toilet was definitely the most time consuming part of the project, so I would probably recommend moving it to make your life a little easier.

After a three day weekend, around $38, and a little hard work we went from this: 

to this:


Towels from Marshalls

Shelf from Home Goods, vase from IKEA, succulent from Hobby Lobby

Pretty awesome right?  I love our new half-bath so much.  It really goes to show you what a little time, and an even smaller budget can do for a room!
Read More

Mar 11, 2013

Get Your Fix!

Ok, I know I said I was going to write next about our new half-bath floor and post some final “after” pictures, but I lied.  I hope you will forgive me, because I have something really fun and non-home related to write about first.  Bathroom info will come later this week!
 
So have you heard about Stitch Fix? It’s basically an online personally shopping experience.  You fill out an online survey listing your age, height, weight, body shape normal clothing sizes, etc.  Then you answer a lot of questions about your style and the types of clothes you normally wear.  So you tell them what you do for a living, what you wear to work, how often you wear casual/professional/date night/fancy outfits.  They also show you collections of pictures and you indicate if you love/like most/like some/dislike the pieces.  The questions help you narrow down your style profile.  Mine is a combination of classic, preppy, and casual.  You also tell them what types of jewelry you wear, what colors/prints/fabric you like or don’t like.  There is a section for comments or to request certain pieces.  Finally, you can share your social media sites with them to give them a better sense of your style.  I share my Pinterest StyleBoard so they could see the types of outfits I am drawn to. Based on all that information they send you five items on a date you choose. 

I got my first fix this past weekend, and I loved it! They seriously nailed my style.  I am keeping three of the pieces, although honestly I liked all five.  Ready for my fashion show?

My favorite! Definitely a keeper. (I actually wore it to work today).

Great casual top.  Keeper #2.

Love the style, but I don't think it's very flattering on me. Brady agrees. Returning.

  Like it, but didn't love it.  It's going back. (The belt is mine, from LOFT).

 This is so "me".  I love stripes (example numero uno) and cardigans.  I think it looks even better unbuttoned.  Here's another picture:

 Don't worry, I don't plan on wearing those patterns together.

So here are more details about how it works:
-When they ship your fix you are charged a $20 styling fee.  If you keep something that $20 gets credited to your purchase.  If you keep nothing you lose the $20. That is the only real risk.
-They send you a prepaid envelope to mail back anything you don’t want.  You have three days to do this.
-If you keep all five things you get 25% off your whole purchase.
-You get to set a price range for different clothing categories (As cheap as possible, $50-100, $100-$150, unlimited, etc.) and Stitch Fix will do their best to accommodate your request.  I believe they say their average piece is $75.  Four out of my five pieces were $78 or less.  Admittedly, this is more than I normally spend on clothes.  However I am trying to start buying more “investment pieces”, rather than always getting cheap things that last a season or two, so I’m OK with it.
-You can schedule a fix as often as once a month, or just occasionally when you want one.  There is no obligation or sign-up fee.
-There is a waitlist.  I think I waited about three weeks after signing up before I got my first fix.

I am not being paid or perked to write this post, I just had a great experience with Stitch Fix and I highly recommend them! But here’s where I will ask a favor of you, lovely reader J If you’re going to sign up, will you please do so through my referral code? I will get $25 credit if you do.  Then you’ll get your own referral code that you can send to your friends.  Thanks! Click here to sign up with my referral link!
Read More
Theme images by Ollustrator. Powered by Blogger.

© {IN}Design, AllRightsReserved.

Designed by ScreenWritersArena